ORTELIUS: Avalanche Transaction Indexer

After launching mainnet of Avalanche, tracking transactions is became one of the core desired requirement for developers and anyone who wants to follow transactions on a network. In order to satisfy this demand, Avalanche transaction indexer that called ORTELIUS has been published.
Avalanche Explorer is using this indexer and providing users to reach every transaction that happening on the Avalanche mainnet and testnet. Avalanche Explorer is currently being used searching transactions by id, account details and token’s info. ORTELIUS is provide flexible facilities to users who wish to use these transaction for a purpose or playing around them (filtering, listing, shorting etc.).
ORTELIUS is a product that can be integrated with a local node. This means that we need a node running on network and ORTELIUS will both run node and implement indexer upon it. The serves that this product provide can be listed as follows:
- keeps the records of events and decisions made on network
- indexes all transaction on X-Chain and P-Chain for both mainnet and testnet(Fuji) network
- provides an API (Application Programming Interface) to be explored all this transactions
Because of his service can be used with docker and docker-compose, we need to install these two service in our machine. There are two mode of ORTELIUS that can be operated. Standalone mode is the fastest and easiest way to run it. But it does not recommended for large-scale projects. Since we will use it for testing and discovering, we will start with standalone mode. Before starting to installation process, docker and docker compose should be installed.
Docker has a well-prepared documents that guide to how to install and how to run. From this installation page, docker can download and install. For example for ubuntu users this link shows how to install docker to machine.
Likewise docker, docker-compose may be installed via this guide.
$ docker-compose --version
Docker version 19.03.13, build 4484c46d9d
$ docker --version
docker-compose version 1.27.4, build 1110ad01
You can check that are they exist and which version is installed through this two commands. The versions are not much important, you may have different version of docker or docker-compose, if everything is installed, time to work with ORTELIUS.
First of all open a terminal and paste this command, this will clone GitHub repository to our local machine and set $GOPATH to ORTELIUS. If you have trouble with $GOPATH, there is a lot source about how to setting it.
git clone https://github.com/ava-labs/ortelius.git $GOPATH/github.com/ava-labs/ortelius
Currently, service has been set to work with Avalanche fuji testnet. Just these below 3 commands should start to run your node and ORTELIUS service that implemented to node.
cd $GOPATH/github.com/ava-labs/ortelius
make dev_env_start
make standalone_run
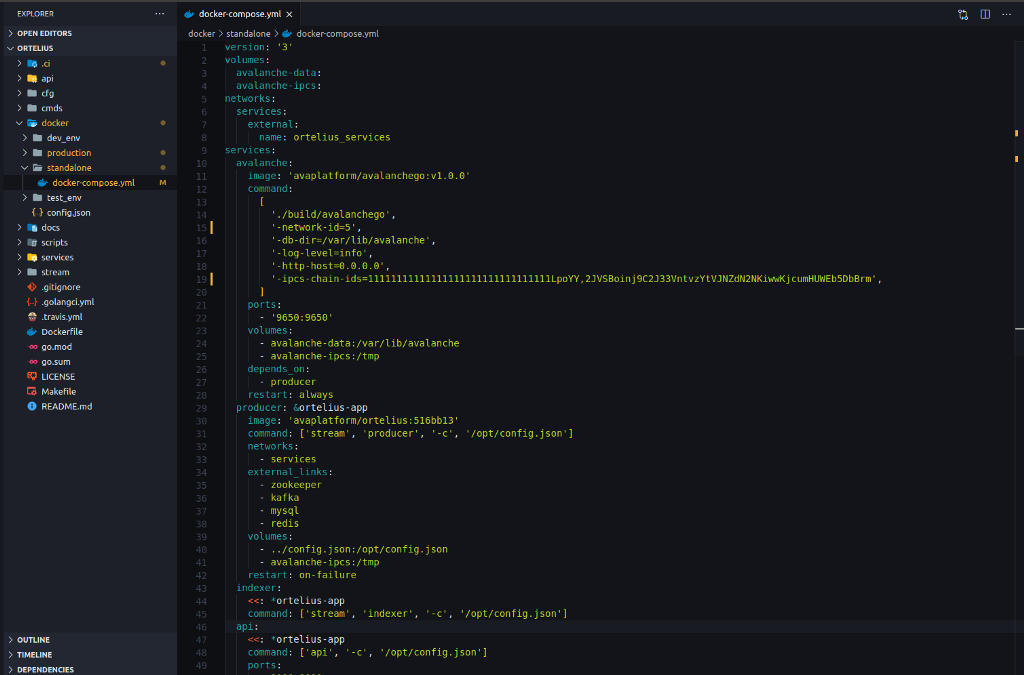
But just in case, to be sure about connecting testnet or in case of having problem on source code, we should check some line of codes. Firstly, open the source code (cloned from github) via a code editor. Source code should be in this path: “go/github.com/ava-labs/ortelius”

Then find the file that in the picture above. The file path is docker/standalone/docker-compose.yml
You have to be sure that it is same with your file and these 2 things is also the same;
- network-id = 5
- “-ipcs-chain-ids=11111111111111111111111111111111LpoYY,2JVSBoinj9C2J33VntvzYtVJNZdN2NKiwwKjcumHUWEb5DbBrm”,
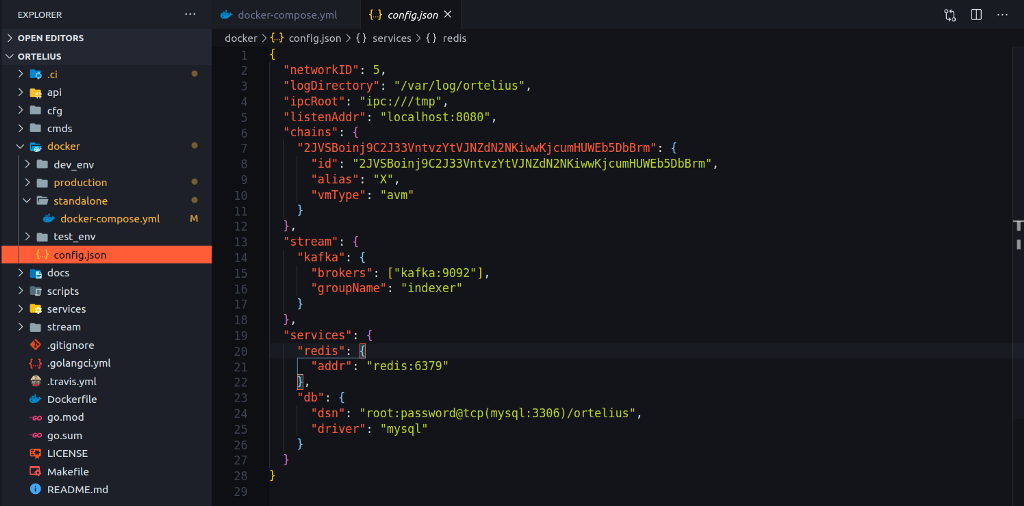
Then come to config.json file. The path is docker/config.json

Here please be sure that these lines and their values match;
"networkID": 5,
"chains": {
"2JVSBoinj9C2J33VntvzYtVJNZdN2NKiwwKjcumHUWEb5DbBrm": {
 "id": "2JVSBoinj9C2J33VntvzYtVJNZdN2NKiwwKjcumHUWEb5DbBrm",
 "alias": "X",
 "vmType": "avm"
 }
}
That’s all we need to do. Please make sure that your these two files match with above ones.Now time to run node and ORTELIUS on testnet. Enter these 3 commands to the terminal again.
cd $GOPATH/github.com/ava-labs/ortelius
make dev_env_start
make standalone_run


If everything goes well, both service should start to run on machine. Please give a couple of minutes to run ORTELIUS and node concurrently. Now, we have a node that run on the testnet and and an indexer that watching these network.
To be sure that indexer is working properly, just go to a browser and paste these address;

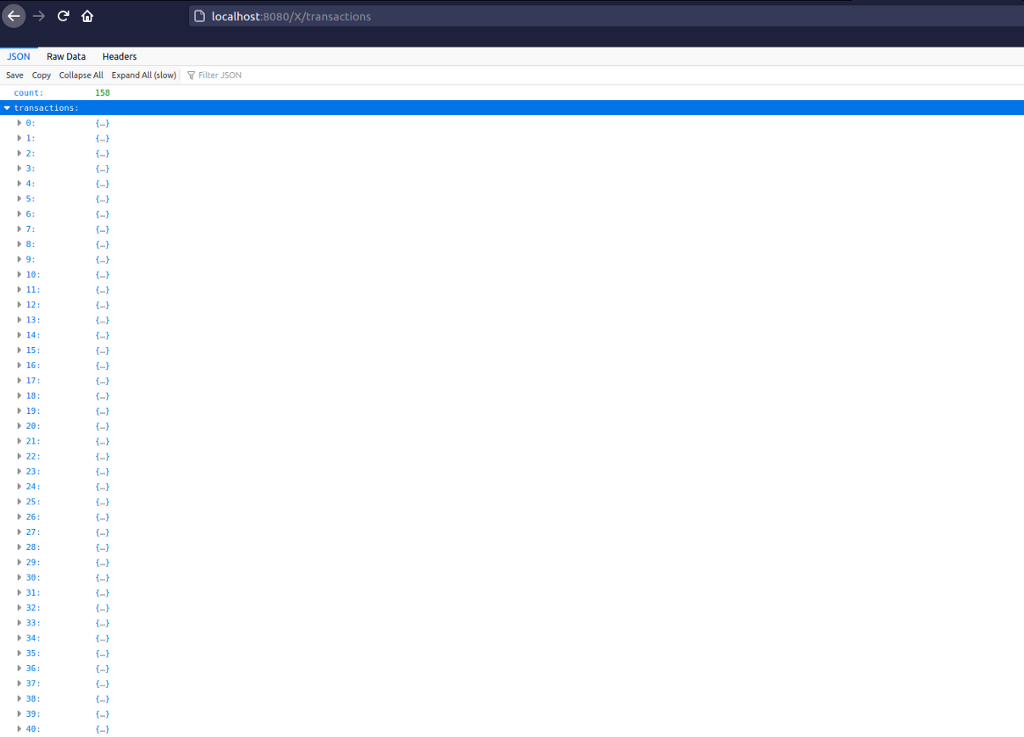
Now you should be able to see the network id and chains that ORTELIUS is tracing. Let’s see the transactions that happening on testnet.

Of course it needs time to sync all transaction happened but you should see a list of transaction. As you see, 158 transaction is synced and it’s keep increasing as much as transaction exists.
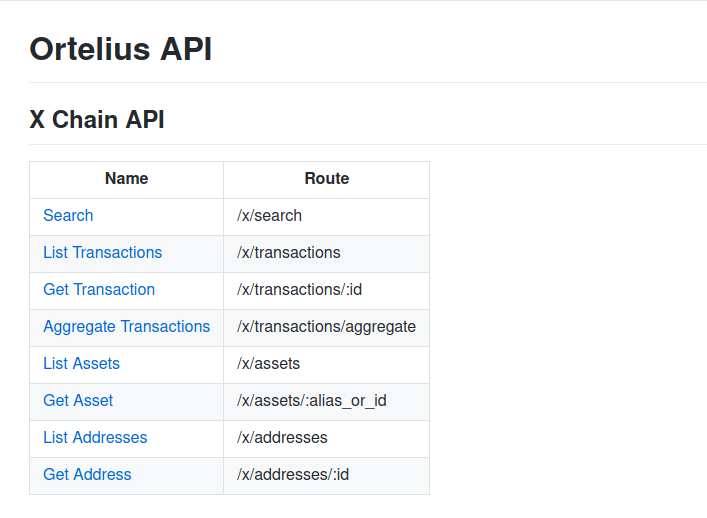
Also you can check that what you can do with this service via ORTELIUS API GUIDE

These operations currently exists and you can call either from browser or from in your code. Of course, these will be diversified and developed in course of time. You can find examples how to use and interact with them in this github documentations.
Last to example to show that how we can interact with ORTELIUS via terminal. In order to do that, you have “Curl” to be installed on your machine.
curl http://localhost:8080/X/transactions
When you run this command on terminal, you should see the list of transaction in JSON format.
As a last example, let’s look at the tokens that created on testnet;
curl http://localhost:8080/X/assets

Here, we examined and setup the ORTELIUS, Avalanche transaction indexer that a desired thing for a network.
See you in the next article…
Murat CELIKTEPE
LinkedIn → celiktepemurat
Twitter → muratceliktepe_
![]()
ORTELIUS: Avalanche Transaction Indexer was originally published in Avalanche Hub on Medium, where people are continuing the conversation by highlighting and responding to this story.

