How to get “real-time alerts” from your Avalanchego Validator Node

Avalanche’s mainnet was live on Sepember 21,2020. Now that more than 500+ validators have a node, it’s time to set up validator node’s “realtime” alert mechanism via Telegram Bot. I will explain how to create a custom bot and installing a small script on validator’s ubuntu operating system to get a real time alert if their Avalanchego process is down, unhealthy or if vm’s CPU consumption is high.
Recently one of the FAQs on Avalanche Discord & Telegram channels is: How can I know instantly if my avalanchego process is stopped, unhealthy or if there is a high CPU consumption which is a sign of something is wrong with my validator node. Now there is a way. I will explain how to create your own custom bot and how to install a small script with a few commands, configure and use it.
Why Telegram? Telegram is one of the most used program for instant messaging and it is known for the possibility to have bots that interact with user privately or within groups. Lets begin with Telegram BotFather which is the one bot to rule them all. Use it to create new bot accounts and manage your existing bots.
Creating you own Telegram BOT
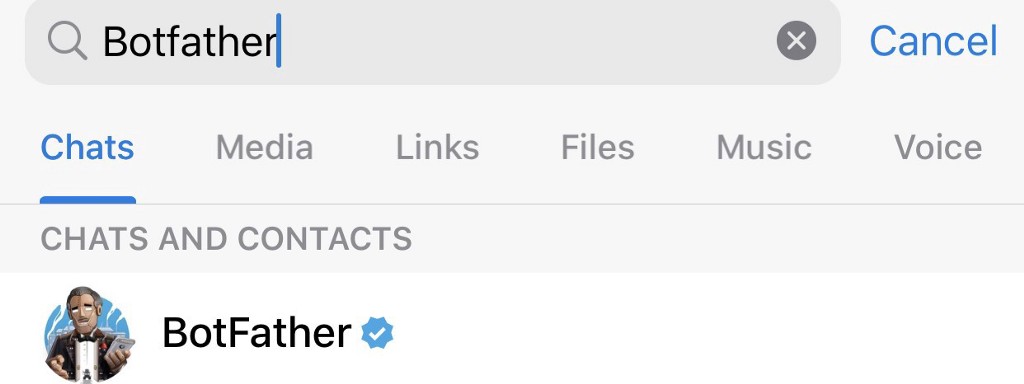
1. Open Telegram, sign in and Enter @Botfather in the search tab and choose this bot. Note, official Telegram bots have a blue checkmark beside their name.
Click “Start” to activate BotFather bot.
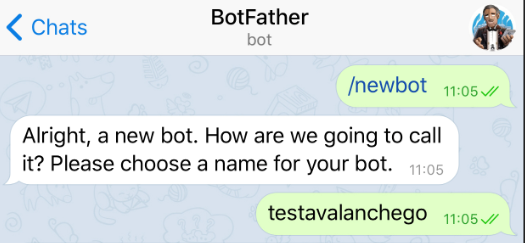
2. Choose the /newbot command and send it. Or just type the command /newbot and follow the instructions given by BotFather

3. Choose a name for your bot. For example my sample one is “testavalanchego”.
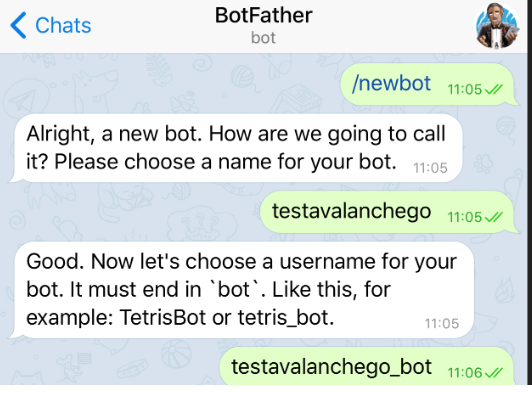
4. And choose a username for your bot — the bot can be found by its username in searches. The username must be unique and end with the word “bot.” So you’ve to give a unique username and it should be ending with bot.
5. After giving the name it’ll show your TOKEN like:
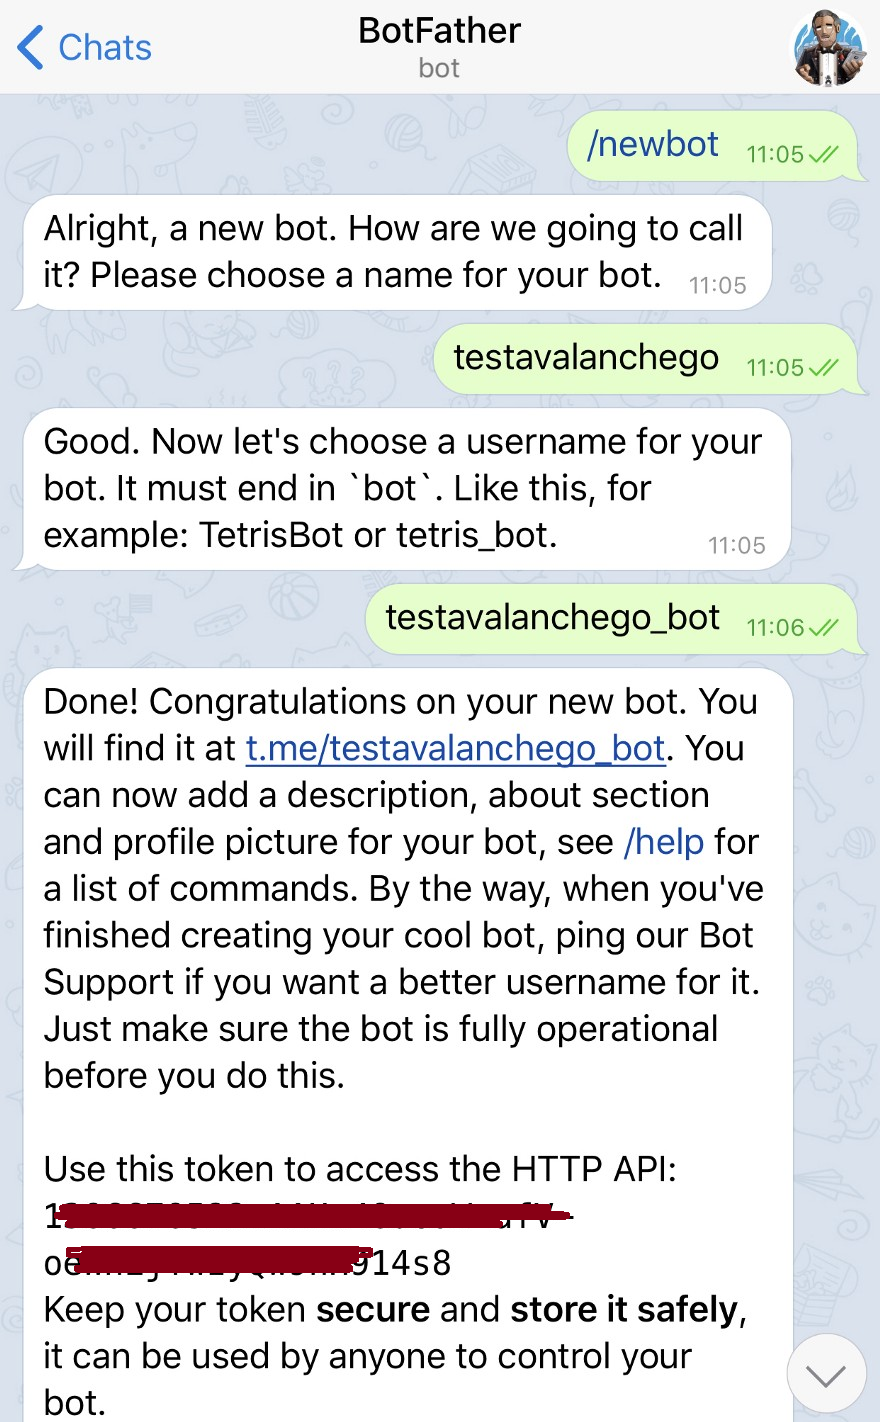
NOTE: Copy the Api Token for further. TOKEN is the part right after “HTTP API: “. We will use it later.

After you choose a suitable name for your bot — the bot is created. You will receive a message with a link to your bot t.me/<bot_username>, recommendations to set up a profile picture, description, and a list of commands to manage your new bot.
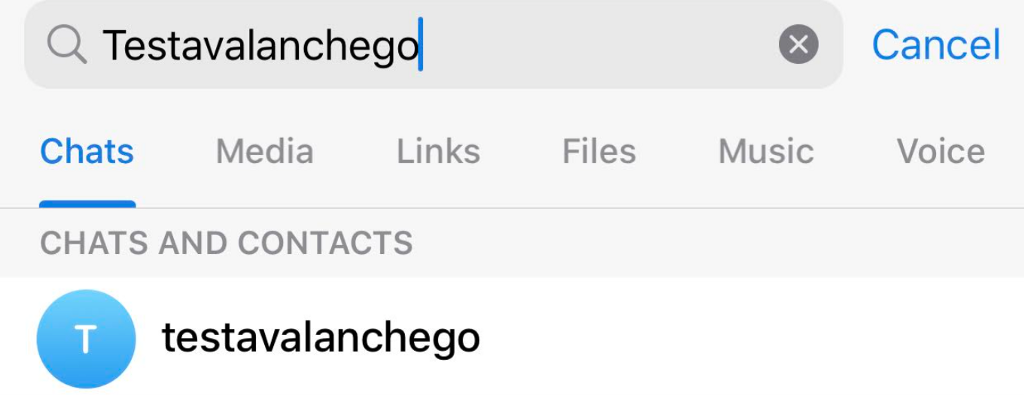
Lets start communicating with our bot. Enter your bot’s name ( my one is testavalanchego i.e.) in the search tab and choose it.
click on the “Start” button and you will be subscribed to your bot.

type /start:

We have a TOKEN. Lets get CHAT ID also, becausse we will give these 2 mandatory parameters as an input to our script in order to get alerts from our validator node.

Go to you vm, login with your Ubuntu user. First install “jq” utility, set your TOKEN variable and via curl command get your Chat ID as shown below:
# install jq
sudo apt-get install jq -y
# Set TOKEN variable
TOKEN=1386633333:AAHAAAAAAAA-afV-oAAAAAAAAAAAAAAAAAA914s8
# Get CHAT_ID
curl -s https://api.telegram.org/bot$TOKEN/getUpdates | jq .result[0].message.chat.id
10522222228
For example, my sample bot’s Chat ID is CHAT_ID: 10522222228
If you can not get your Chat it, go to your telegram and type /start to your bot and run curl command again. There is no harm to type “/start” 3–4 times.
Installing our Monitoring Script
Our monitoring scripts has 3 fundamental checks every minute:
- check avalanchego process is up and running,
- check avalanchego proces is healthy
- check CPU usage(default threshold is 40%).
Our custom developed Avalanchego monitoring script has 2 mandatory, 2 optional parameters. Mandatory ones are TOKEN and CHAT ID. Optional ones are CPU threshold and IP. A lot of validators has IP 127.0.0.1 to get their API calls. If you do same, so you don’t have to change IP parameter, it’s default is 127.0.0.1. Default CPU threshold value is 40%. If you want you can change it to any value you like. Don’t forget to use 2 digits after dot such as 50.00, 75.90 etc.
Installation steps
1) Login your vm, go to your “Home Directory” via cd command:
# go to home directory
cd
2) Download our monitoring script with “git clone” and locate to scripts directory:
# Git clone:
git clone https://github.com/burcusan/telegram-monitor-scripts.git
cd telegram-monitor-scripts
3) Install with “install_avax_monitor.sh” script, give your TOKEN and CHAT ID values as these are mandatory parmeters:
# Usage:
./install_avax_monitor.sh -t <YOUR TELEGRAM TOKEN> -c <YOUR TELEGRAM CHAT ID>
# Example:
./install_avax_monitor.sh -t 13031231111111AAEx-kIC9E1237L111111111123ongZ3_c-g -c 10522222228
If you want to use default parameters for CPU threshold ad 40% and API Call IP is 127.0.0.1 ,go directly to next step (4).
If you want to change default CPU threshold value, you can do it by setting a parameter such as:
# Usage:
./install_avax_monitor.sh -t <YOUR TELEGRAM TOKEN> -c <YOUR TELEGRAM CHAT ID> -p <CPU THRESHOLD>
# Example:
./install_avax_monitor.sh -t 13031231111111AAEx-kIC9E1237L111111111123ongZ3_c-g -c 10522222228 -p 50.00
If you start your avalancge process with “ — http-host=“, your API call IP probably different than default one 127.0.0.1. Check and if you have different IP than 127.0.0.1 for your API calls, you can set that IP as a parameter such as :
# Usage:
./install_avax_monitor.sh -t <YOUR TELEGRAM TOKEN> -c <YOUR TELEGRAM CHAT ID> -i <IP>
# Example:
./install_avax_monitor.sh -t 13031231111111AAEx-kIC9E1237L111111111123ongZ3_c-g -c 10522222228 -i 33.44.55.xxx
Or if you want you can change CPU and IP parameters entering just one command:
# Usage:
./install_avax_monitor.sh -t <YOUR TELEGRAM TOKEN> -c <YOUR TELEGRAM CHAT ID> -p <CPU THRESHOLD> -i <IP>
# Example:
./install_avax_monitor.sh -t 13031231111111AAEx-kIC9E1237L111111111123ongZ3_c-g -c 10522222228 -p 50.00 -i 33.44.55.xxx
4) Test your script is working or not as shown below:
./check_avalanchego_status.sh > check_avalanchego_status.logcat check_avalanchego_status.log
# Example Output :
 >>>> : Fri Oct 2 15:20:30 +03 2020
 >>>> : TOKEN=<TELEGRAM TOKEN>
 >>>> : CHAT_ID=<CHAT ID>
 >>>> : HTTP_CODE= 200
 >>>> : CURL_STATUS= 0
 >>>> : FILE= /tmp/tmp_check_Avalanchego
 >>>> : Avalanchego node is running!
 >>>> : Fri Oct 2 15:20:30 +03 2020 - [INFO] Avalanchego node is healthy ! - health.getLiveness result.healthy=true hostname=oracl
 >>>> : true
 >>>> : CPU_LOAD=2.28
 >>>> : CPU_LOAD_CRITICAL=40.00
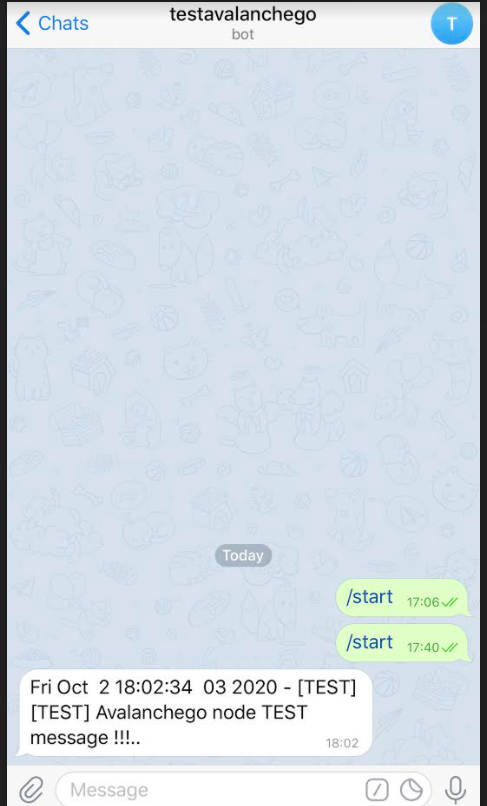
5) Now test you installation is ok, send your telegram bot a test message as shown below:
./check_avalanchego_status.sh test
# Example Output :
>>>> : Fri Oct 2 16:25:53 +03 2020 — [TEST] [TEST] Avalanchego node TEST message !!!..
Sample telegram test message :
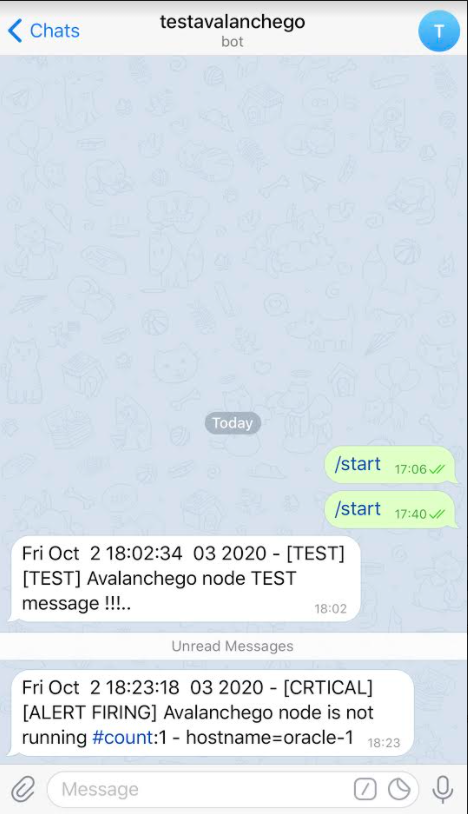
Sample telegram ALERT message :
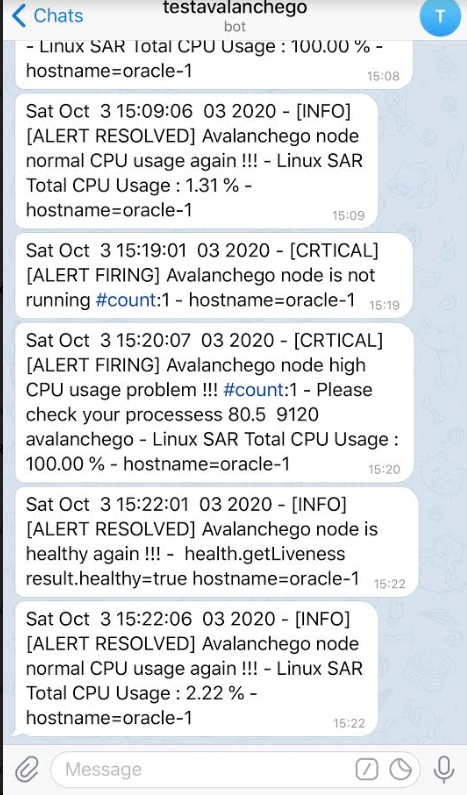
Sample telegram ALERT RESOLVED message :
When CPU threshold exceeded, you will get an alert and when it is back to normal, you will get another message as shown below:
CONCLUSION
Our script will alert you if your node is not up, is not healthy or CPU is more than 40% as default and alert you when the problem is fixed. It checks your node every minute but it does not generate and send an alert every minute. It sends alert message with [ALERT FIRING] tag to Telegram Bot if the problem still exits for:
1 minute, 5 minutes, 15 minutes, 30 minutes, 1 hour, 2 hours, 6 hours, 12 hours, 24 hours.
So, max number of alerts you will get is 8 for 1 day if problem persists. After sending 8. message, script stop sending ALERT_FIRING messages; it is node owner’s responsibility to fix the problem. We don’t want to flood with message to validators and create “false positive” alerts. But as script check continuously every minute, if problem is gone , script will immediately sends [ALERT RESOLVED] message to the user without any time limit.
If you successfully execute all the steps, that means you node’s health/up-down state and CPU usage is checked every minute. If script gets an error when calling “/ext/health” API, the result is “unhealthly”, if your node is not running/not bootstrapped or if CPU usage is high, you will get an alert via Telegram bot. And when these checks are ok, you will be notified also.
PS — IF YOU DON’T WANT TO GET ALERTS , FOLLOW THIS PART
If you do not want to get alerts via Telegram Bot anymore, just remove a line about our script in your crontab file. Edit it via crontab -e and remove or comment ( put # at the begining of line) related line as shown below:
#sample output
#* * * * * /home/username/telegram-monitor-scripts/check_avalanchego_status.sh > /home/username/telegram-monitor-scripts/check_avalanchego_status.log 2>&1
Keep safe & healthy, and have a healthy Avalanche node 🙂
Useful links
Developer Documentation | Avalanche
Avalanche related Platforms & Links
Website | Whitepapers | Twitter | Discord | GitHub | Documentation | Explorer | Avalanche-X | Telegram | Facebook | LinkedIn | Reddit | YouTube
![]()
How to get “real-time alerts” from your Avalanchego Validator Node was originally published in Avalanche Hub on Medium, where people are continuing the conversation by highlighting and responding to this story.